How To Use Your Raspberry Pi To Monitor Internet Speed
Testing speed on a regular basis allows you to pinpoint performance trends, isolate which devices may be causing issues for your wireless network, and ensure no one is stealing your bandwidth.
This tutorial is made for you if you’re interested in monitoring how your download speed, upload speed, and ping are affected over time.
In order to measure your speed and log this information you will need the following hardware and software;
- Raspberry Pi 3 or 4
- Internet Connection
- Ubidots Account ( It’s free )
- No coding skills needed
How does a Raspberry Pi Internet Speed Monitor work?
With your raspberry pi connected to the internet, the pi is able to run a speed test using special software from Ookla, this data is then sent to a wrapper script that will parse the information and send the relevant information like download speed, upload speed and ping to a central server in the cloud which will allow you to see the data.
In short, what you need to do is;
- Install the Speedtest CLI on the Raspberry Pi
- Pipe the result of this to a Python Script
- Upload this data to a Ubidots
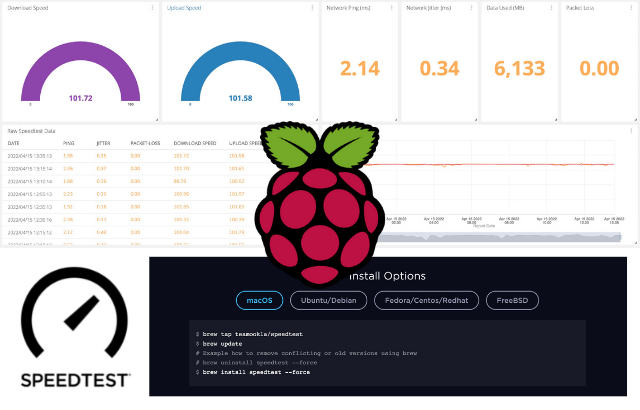
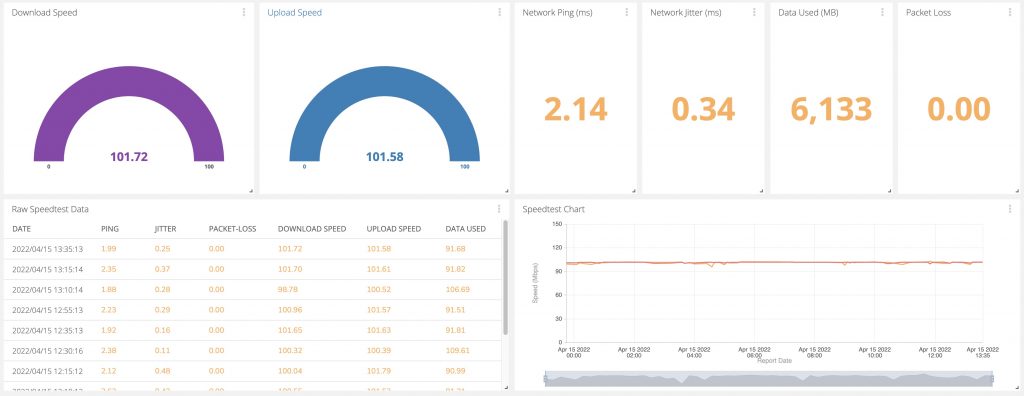
We will build the following Speedtest Dashboard
How to install Speedtest CLI on the Raspberry PI
Built for software developers, system administrators, and computer enthusiasts alike, Speedtest CLI is the first official Linux-native Speedtest application backed by Ookla®.
You can run the following commands in the terminal connected to your Raspberry Pi, you can use Putty on Windows to run the following commands.
SSH into your Raspberry Pi
ssh your_username@ip_address_of_piMake sure your Pi is up to date
sudo apt-get update
sudo apt-get upgrade
Install Speedtest CLI
sudo apt-get install curl
curl -s https://install.speedtest.net/app/cli/install.deb.sh | sudo bash
sudo apt-get install speedtest
Run Speedtest for the first time.
When you first run the speedtest software on your Raspberry Pi for the first time then you will be asked to agree to some terms and conditions.
To proceed passed, Run the command below in your terminal and then type in “YES” followed by the ENTER key. All subsequent runs will be headless without any prompts.
speedtestWriting the Python Script to pipe the information to Ubidots
Luckily Python is already installed on the latest Raspberry PI OS, you can run the following command to test it.
erik@pi:~ $ python --version
Python 3.9.2
// If that command fails then run the following to install it
// sudo apt-get install python3
You will now need to create a file and paste some python code inside of it, the only thing you need to change in the code is the API key to your Ubidots account.
You can use this link to get your API key on Ubidots
Create the Python file
sudo nano speedtest_monitor.pyThis creates a file named speedtest_monitor.py in your home directory (/home/your_username) and starts editing it with the nano program.
In this file, paste the following, but be sure to update your API key first, I would recommend you paste this into notepad first and then change the API key and then paste it into nano on your Raspberry Pi.
#!/usr/bin python3

import sys
import json
import requests

def ubi_upload():
    data = json.load(sys.stdin)

    type = data['type']

    if type == 'log':
        # some error use print below to see response, alternatively run $ speedtest -f json
        pass
    elif type == 'result':
        # success, upload to ubidots
        upload_to_ubi(data)
    else:
        # uncaught error use print below to see response, alternatively run $ speedtest -f json
        pass

def upload_to_ubi(data):
    try:
        payload = {
            'download': round(data["download"]["bandwidth"] / (1024*1024) / 0.125, 2),
            'upload': round(data["upload"]["bandwidth"] / (1024*1024) / 0.125, 2),
            'ping': round(data["ping"]["latency"], 2), # 0ms to 20ms is considered good
            'jitter': round(data["ping"]["jitter"], 2),
            'packet-loss': round(data["packetLoss"], 2),
            'bytes_used': round((data["download"]["bytes"] + data["upload"]["bytes"] ) / (1024*1024), 2),
        }

        r = requests.post('http://industrial.api.ubidots.com/api/v1.6/devices/raspberry-pi/?token=your_api_key_here', data=payload)
        r.raise_for_status()

        # Print the server's response Uncomment the next line for debugging purposes
        # print(r.content)

    except Exception as identifier:

        print(identifier)

if __name__ == '__main__':
    ubi_upload()
Save and exit (ctrl+x followed by y and then enter).
Back in the Linux command prompt, enter the following command
speedtest -f jsonAfter about 15 seconds you should see something similar to the below ( your values might differ )
erik@pi:~ $ speedtest -f json
{"type":"result","timestamp":"2022-04-15T12:42:21Z","ping":{"jitter":1.129,"latency":2.3380000000000001},"download":{"bandwidth":12625799,"bytes":48122172,"elapsed":3812},"upload":{"bandwidth":13035767,"bytes":48316380,"elapsed":3703},"isp":"Seacom","interface":{"internalIp":"192.168.1.3","name":"eth0","macAddr":"03:01:04:04:0P:0I","isVpn":false,"externalIp":"13.31.12.21"},"server":{"id":33719,"host":"cpt-speedtest.frogfoot.com","port":9090,"name":"Frogfoot","location":"Cape Town","country":"South Africa","ip":"10.20.192.74"},"result":{"id":"6d339538-3db6-ad04-b686-89dv1aaff4x2","url":"https://www.speedtest.net/result/c/6d339538-3db6-ad04-b686-89dv1aaff4x2","persisted":true}}
erik@pi:~ $
Now pipe this data to the Python script you just created and then you will see it show up in your Ubidots dashboard
speedtest -f json|python3 speedtest_monitor.pyWhen the data shows up as variables in Ubidots you can make this script run every hour by creating a cron job on your Raspberry Pi
crontab -eScroll down and add the following line
0 * * * * speedtest -f json|/usr/local/bin/python3 /home/your_username/speedtest_monitor.pyYour crontab file should now look like this
GNU nano 5.4               /tmp/crontab.xxxGgt/crontab
# Notice that tasks will be started based on the cron's system
# daemon's notion of time and timezones.
#
# Output of the crontab jobs (including errors) is sent through
# email to the user the crontab file belongs to (unless redirected).
#
# For example, you can run a backup of all your user accounts
# at 5 a.m every week with:
# 0 5 * * 1 tar -zcf /var/backups/home.tgz /home/
#
# For more information see the manual pages of crontab(5) and cron(8)
#
# m h  dom mon dow   command

# Upload Speedtest results to UbiDots
0 * * * * speedtest -f json|/usr/local/bin/python3 /home/your_username/speedtest_monitor.py
Press ctrl+x to Save and Exit
By now your Raspberry Pi will be automatically running internet speed tests on your connection and uploading that data to your Ubidots account on an hourly basis.
This same principle can be used to create a speedtest.csv file for you if you prefer to use Excel to make graphs, feel free to let me know if you want me to create an Internet Speedtest to CSV tutorial for you.
I also have a tutorial on how to set up Pi-hole on your Raspberry Pi to block Ads, this also greatly improves your internet browsing experience by freeing up a lot of chunk traffic on your network.

How is internet speed measured?
- Download: The time it takes to pull data, measured in megabits per second (Mbps).
- Upload: The time it takes to send data, measured in megabits per second (Mbps).
- Ping: The time it takes between sending a request and receiving a response, measured in milliseconds (ms) and also referred to as Latency.
What is a good download speed?
- ADSL (1-24 Mbps)
- VDSL (15-130 Mbps)
- Fiber (100 Mbps and beyond)
Regarding what speeds you need for these common activities;
- 1-5 Mbps for checking email and browsing the web
- 15-25 Mbps for streaming HD video
- 40-100 Mbps for streaming 4K video and playing online games
- 200+ Mbps for streaming 4K video, playing online games, and downloading large files
Broadband speed results are typically broken down into different numbers representing upload and download speed and delay or latency. This might sound complicated, so if you’re looking for benchmarks to compare your broadband performance against, here are the numbers to look for.
Cisco – an industry-leading manufacturer of networking and telecommunications hardware – says that for a good quality of service:
- Ping (or latency shouldn’t go over 150 ms or 300 ms for a round trip)
- Jitter should remain below 30 ms
- Packet loss should be less than 1%.
Your download and upload speeds should match the rates specified by your broadband provider for your plan unless you’re on ADSL or VDSL and live far from a cabinet or exchange. ADSL and VDSL are generally offered as a best-effort service due to the extensive copper wire infrastructure required to carry the signal.
Popular Categories
Ad Blockers AWS Bitcoin CMD cPanel crypto Dark web Google IoT MikroTik Python Reviews SmartDNS Sonoff Tor VPN Windows WordPress Xiaomi Youtube Raspberry PiSubscribe (It's Free)
Featured Articles

How to access BBC iPlayer outside of the UK
You might have found that Hulu is limited to US viewers and the BBC iPlayer is likewise limited to UK IP addresses, however using a very easy to set up proxy server you can access BBC Iplayer, Hulu and many others from any country on all of your internet capable devices such as your Laptop, PC, Mobile Device, Kindle Fire TV, Apple TV, Google Chromecast etc. In this guide you get the ultimate viewing experience when streaming/downloading any type of regional or geo-blocked content online.
Read The Article
How to download Youtube videos as MP3 files.
To convert a Youtube video or any video for that matter requires just one step, in essence you will transcode the video file (normally an MP4) to MP3 using ffmpeg. In this tutorial I will show you how you can convert videos to audio in a matter of seconds, it does not cost a cent and requires very little effort.
Read The Article
The most important plugin for your WordPress website
Google’s official WordPress plugin. Get insights about how people find and use your site, how to improve, and monetize your content, directly in your WordPress dashboard. If you have a WordPress website and would like to see how users find and use your website, Site Kit is right for you. To help you build, maintain, and grow your online presence, Site Kit gives you easy-to-understand metrics and actionable insights directly on your WordPress dashboard.
Read The Article